Documentation Index
Fetch the complete documentation index at: https://docs.quikquery.io/llms.txt
Use this file to discover all available pages before exploring further.
Integrating Google Drive with QuikQuery
This guide will walk you through the process of integrating Google Drive with QuikQuery. By the end of this documentation, you will be able to configure Google Drive API, add credentials to QuikQuery, and fetch files (txt, docx, pdf, pptx, Google Docs, Google Slides) to store them in QuikQuery for AI-powered chat functionality.Step 1: Configure the Google Account
To integrate Google Drive, you need to configure your Google account and enable the Google Drive API. Follow these steps:1.1 Activate Google Drive API
- Go to the Google Cloud Console.
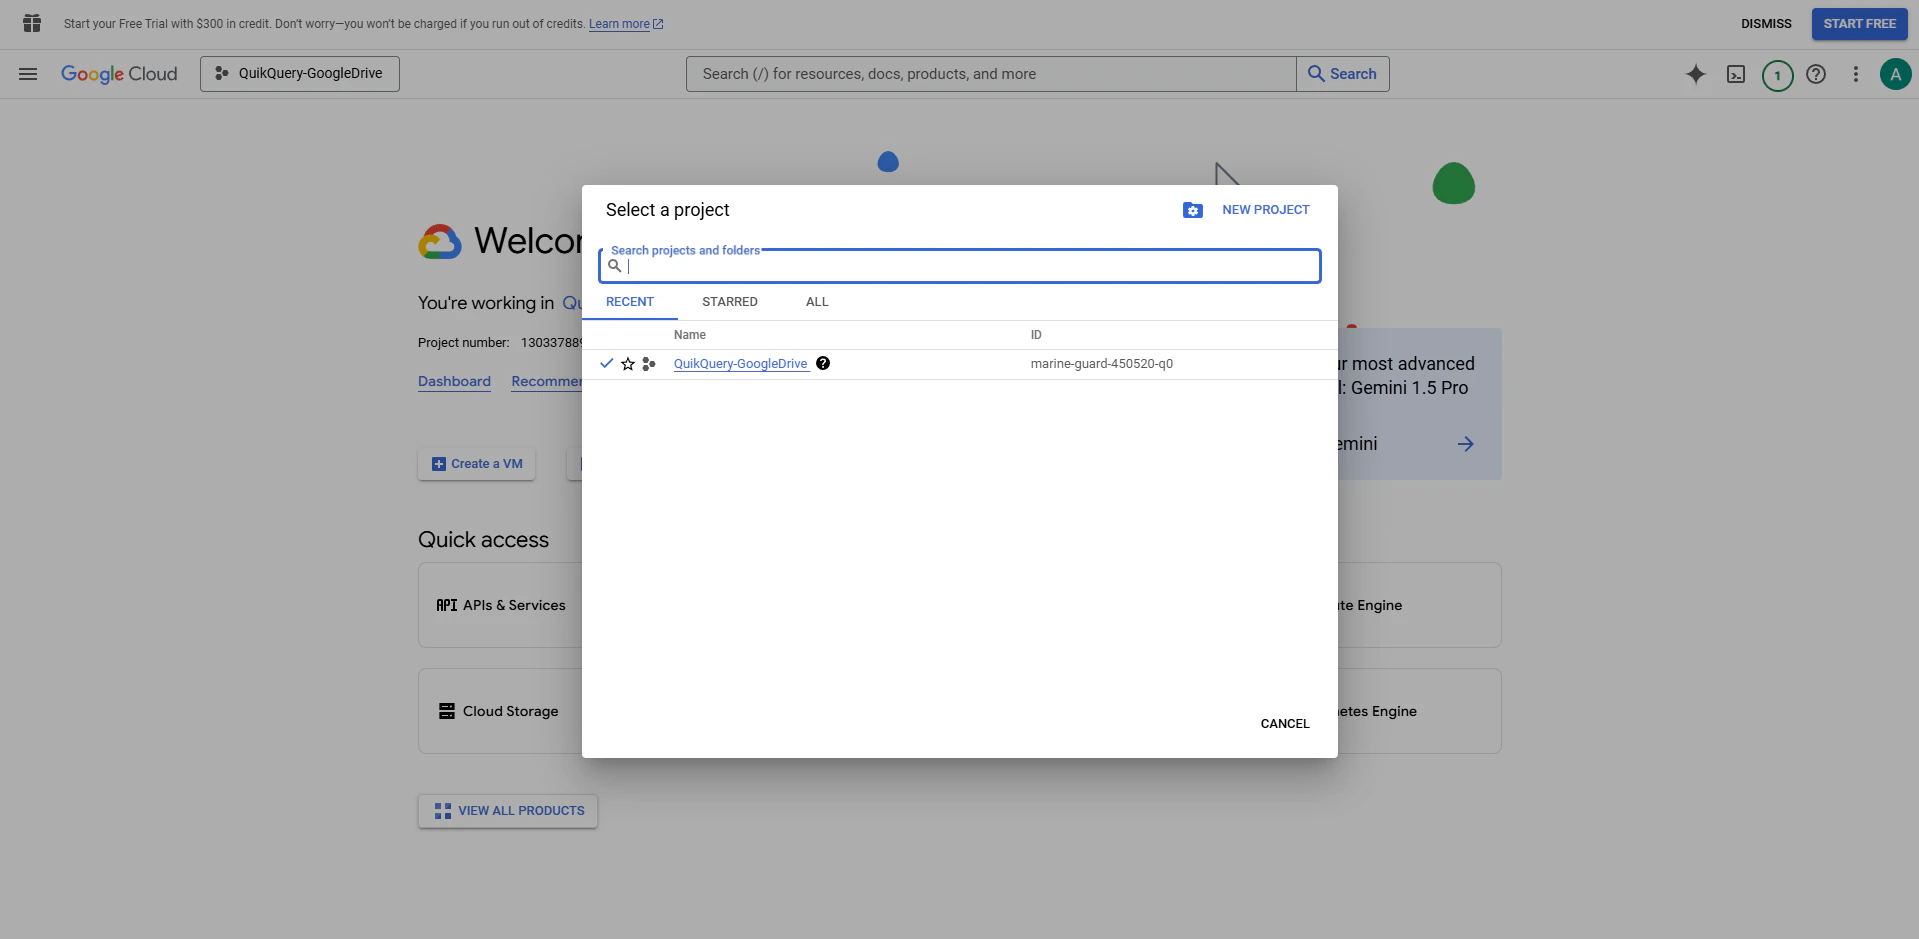
- If you don’t have a project yet, click on Create Project.
- Enter a project name (e.g.,
QuikQuery-GoogleDrive). - Click Create.
- Enter a project name (e.g.,
 3. Once the project is created, select it from the dropdown at the top of the page.
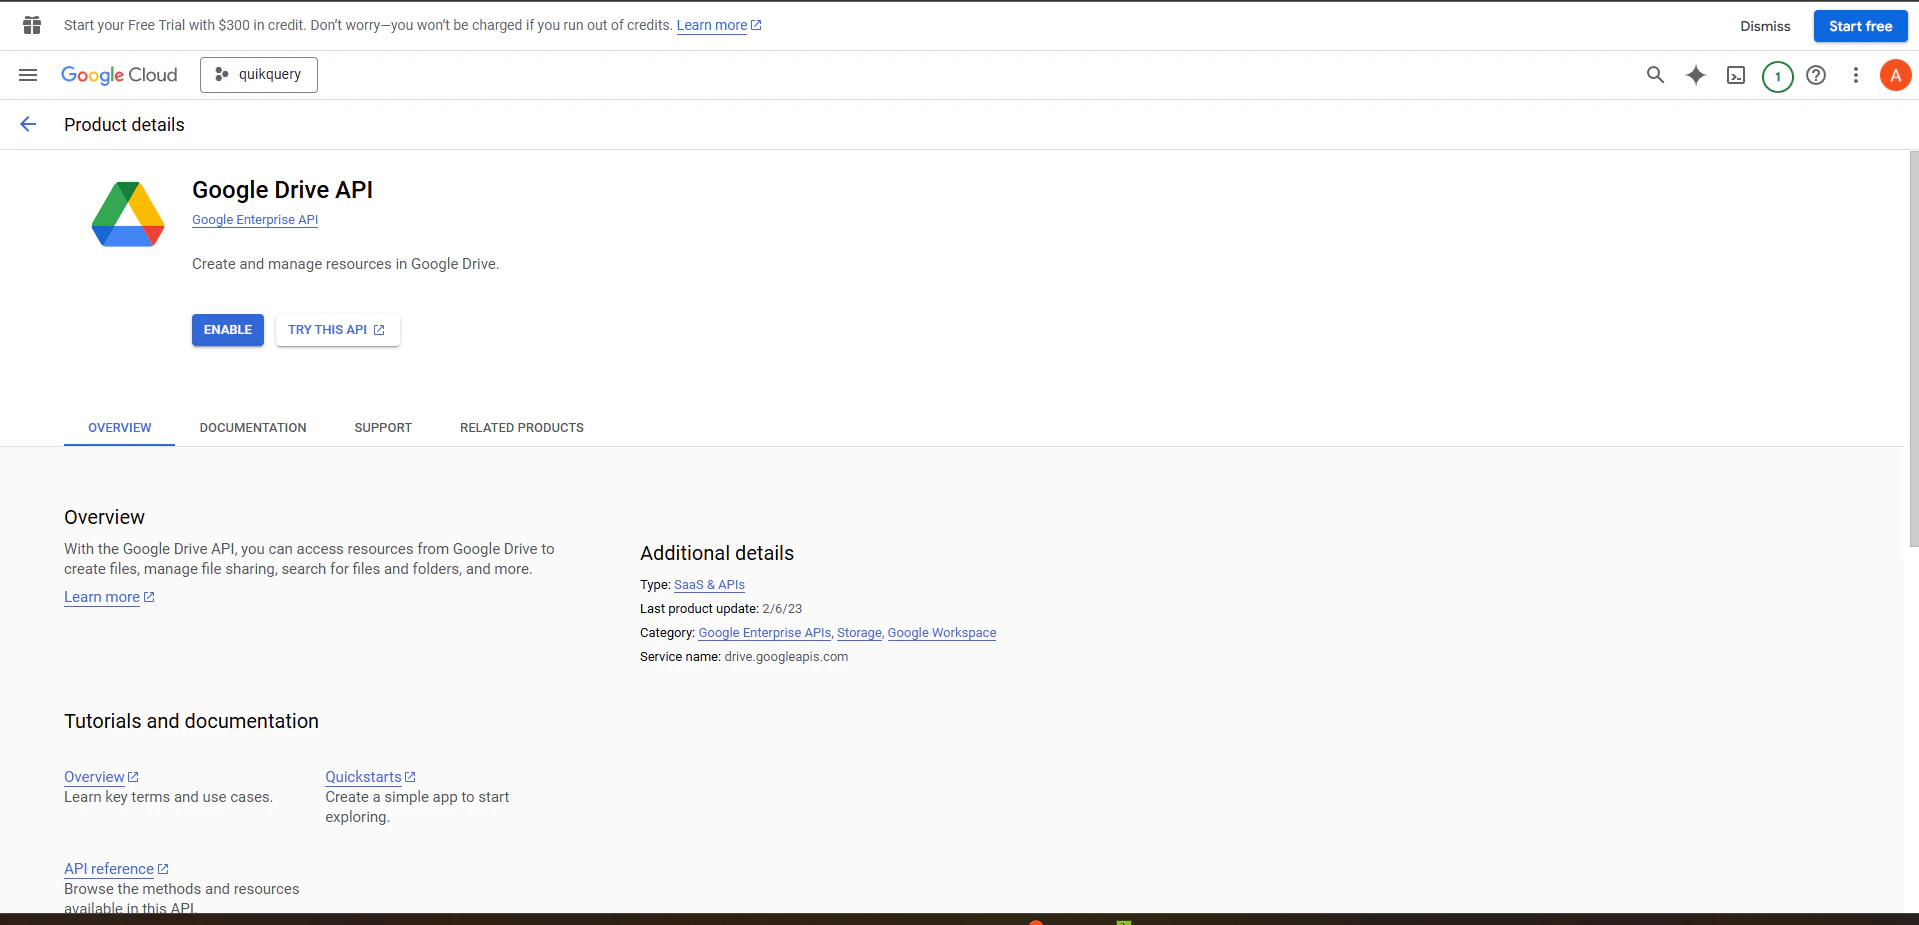
- Navigate to APIs & Services > Library.
- Search for Google Drive API and click on it.
-
Click Enable to activate the API for your project.
1.2 Create Credentials
- Go to APIs & Services > Credentials.
- Click Create Credentials and select OAuth client ID.
-
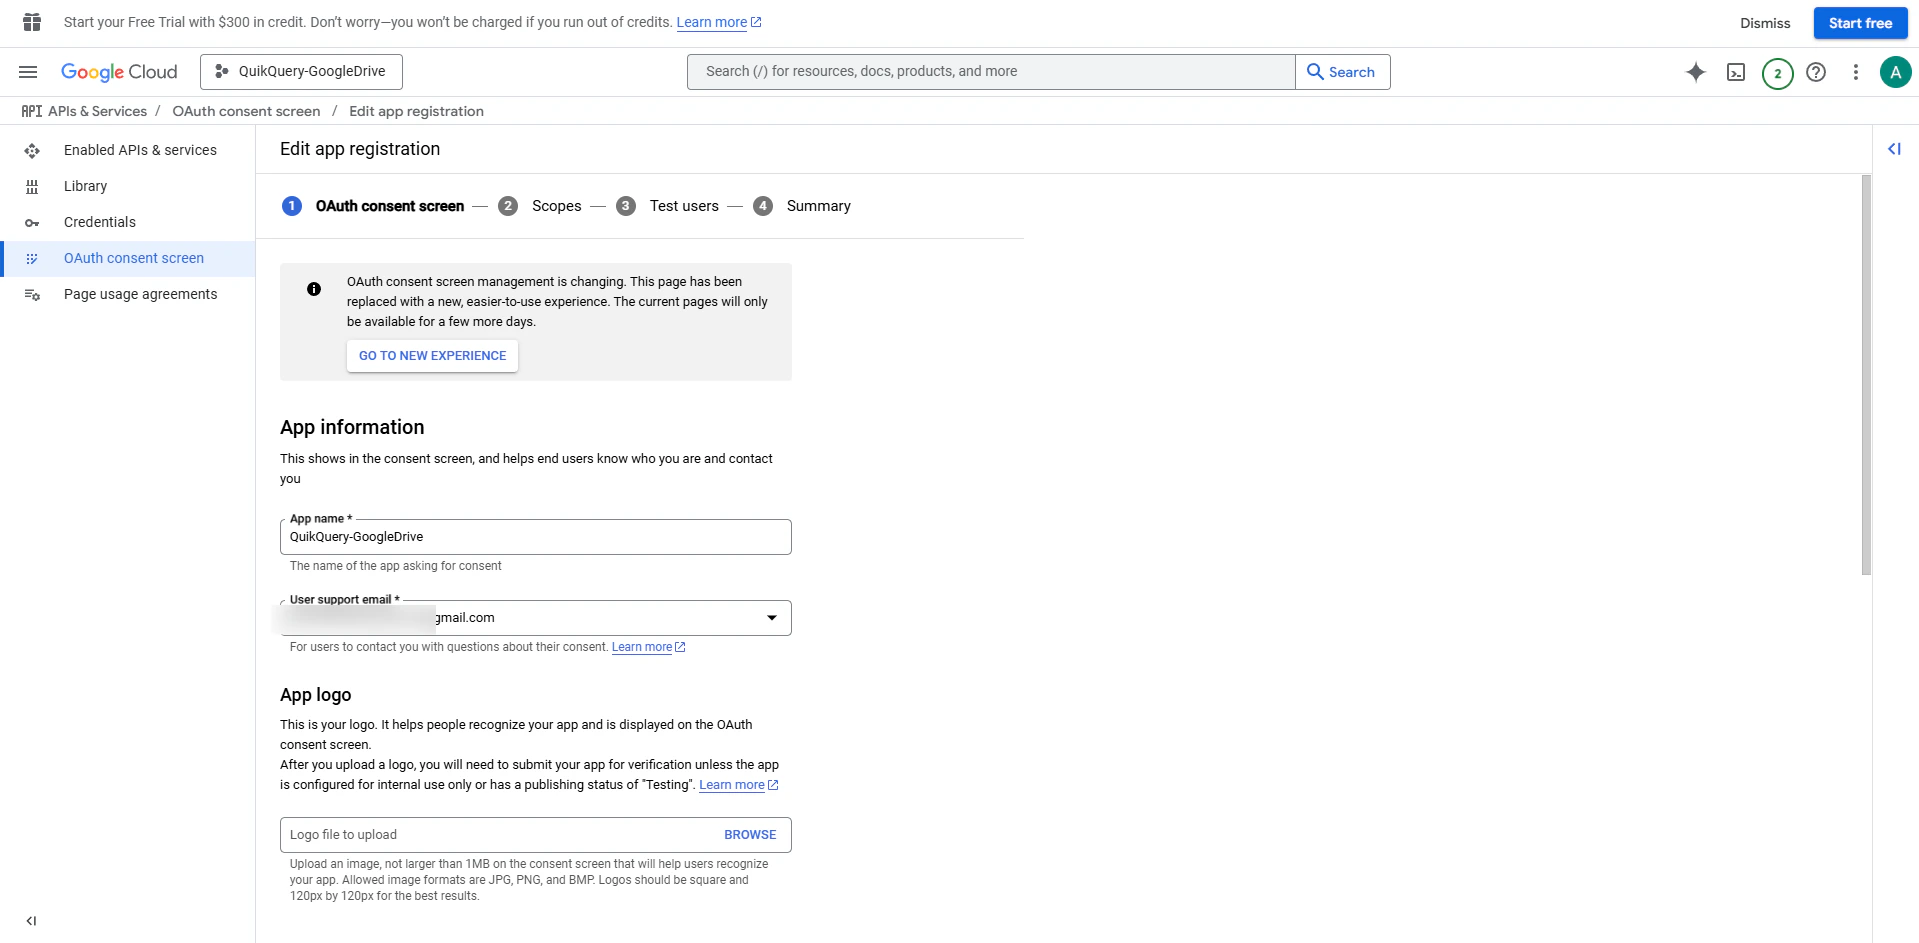
If prompted, configure the OAuth consent screen:
- Choose External for user type.
- Fill in the application name (e.g.,
QuikQuery-GoogleDrive). - Add your email under User support email.
- Add your email under Developer contact information.
- Click Save and Continue.
-
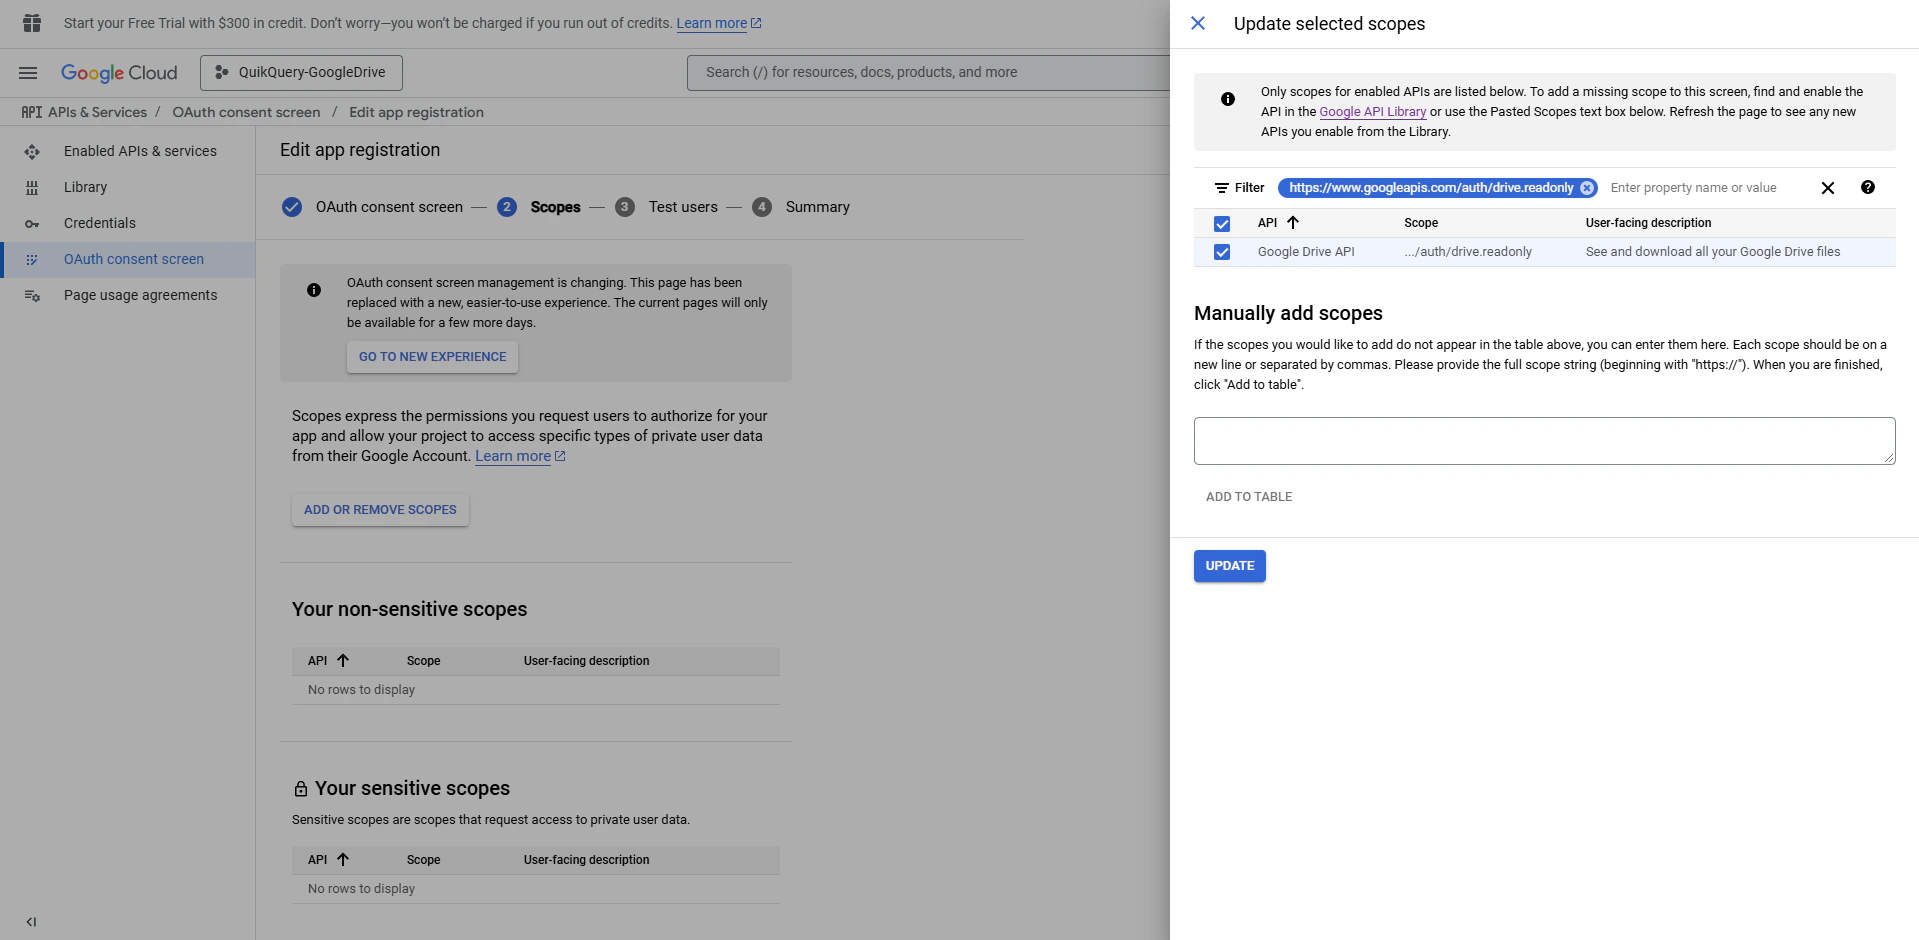
Add Scopes:
- Under Scopes, click Add or Remove Scopes.
- Search for
https://www.googleapis.com/auth/drive.readonlyand select it. This scope allows QuikQuery to read files from Google Drive without modifying them. - Click Update.
- Click Save and Continue.

-
Add Test Users:
- Under Test user Click Add Users.
- Enter the email addresses of the users who will test the integration (e.g., your team members or test accounts).
- Click Save and Continue.
-
Go Back to Dashboard:
- After adding test users, go back to the Credentials dashboard by clicking Credentials in the left-hand menu.
-
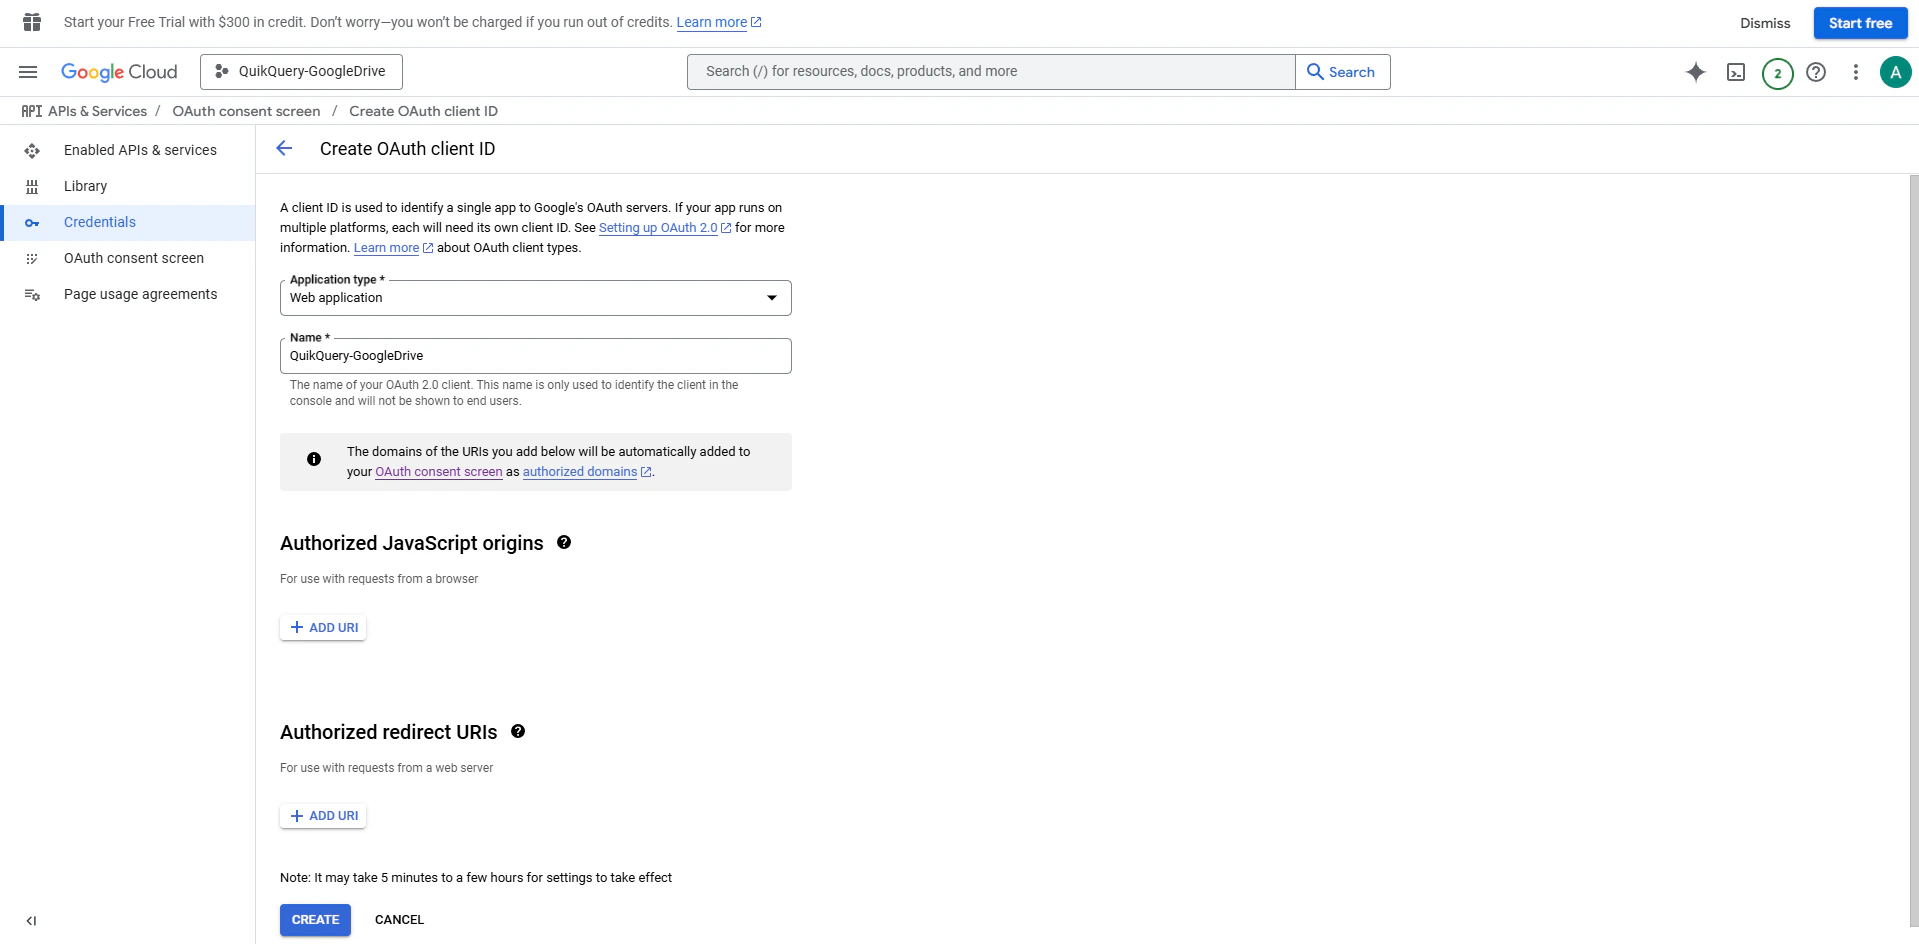
Create OAuth Client ID:
- Click Create Credentials and select OAuth client ID.
- Fill in the application name (e.g.,
QuikQuery-GoogleDrive). - Select Web Application as the application type.
- Under Authorized redirect URIs, add the redirect URL you will get from QuikQuery in Step 3. For now, you can leave this blank and come back to it later.
- Click Create.
-
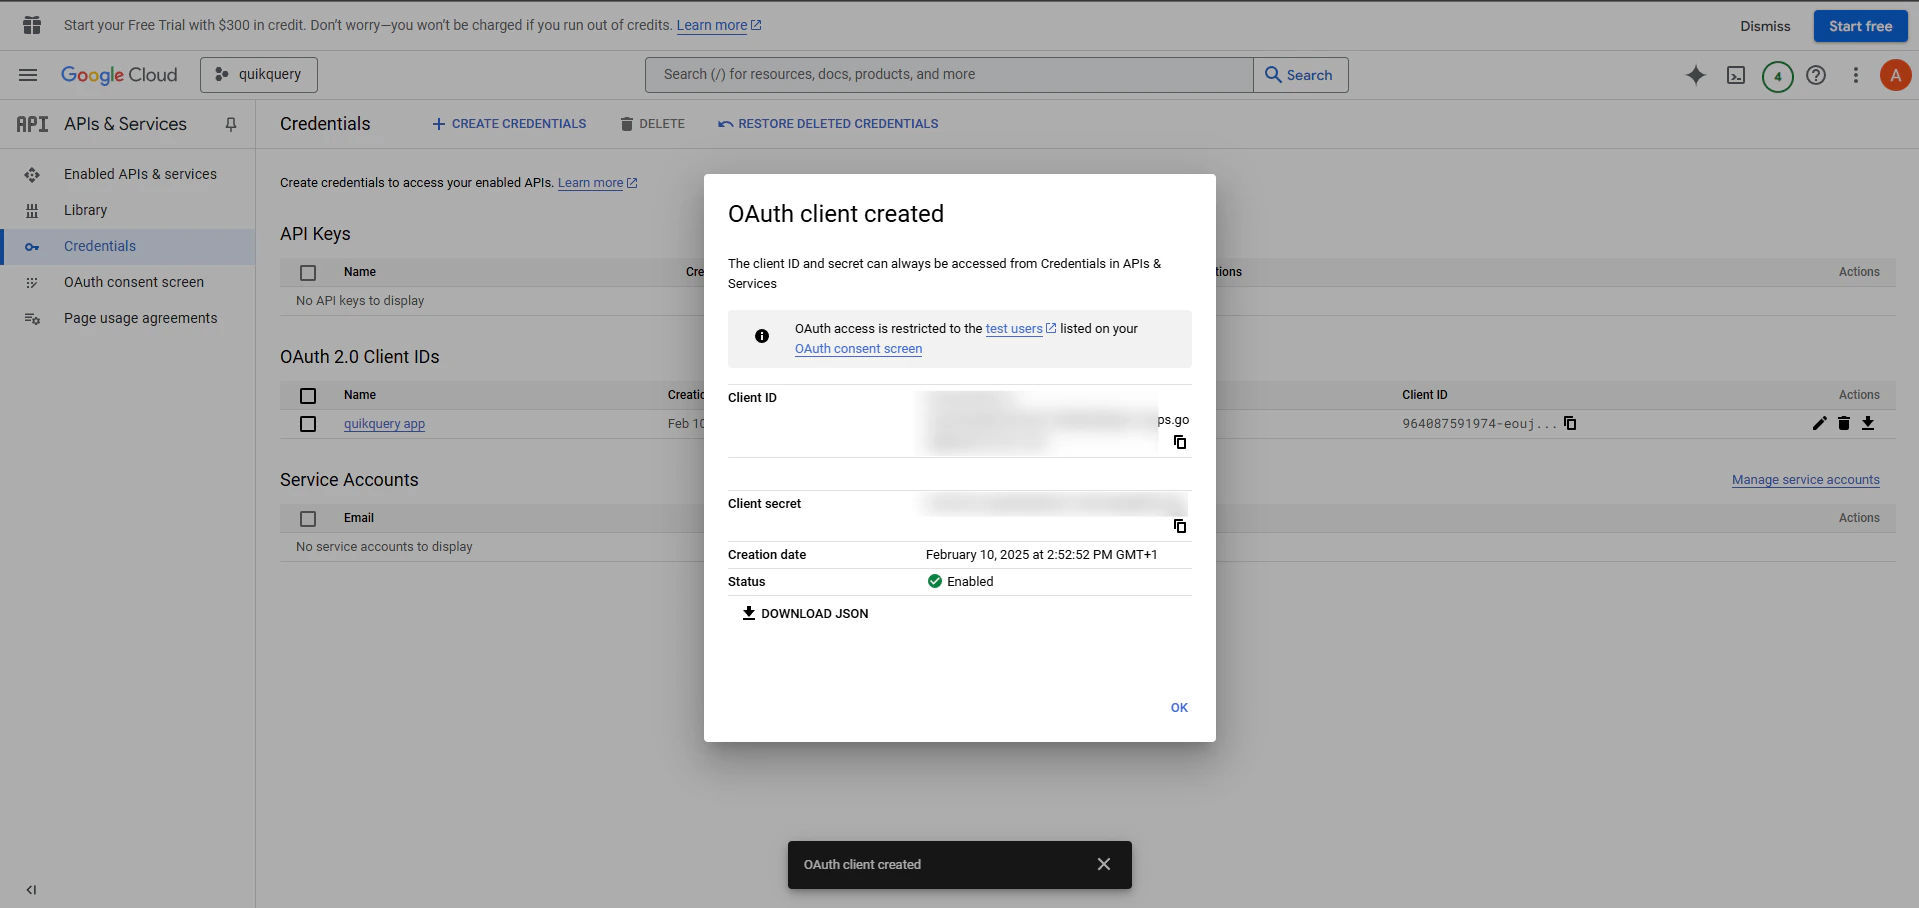
Show Credentials:
- After creating the OAuth client ID, you will see your Client ID and Client Secret.
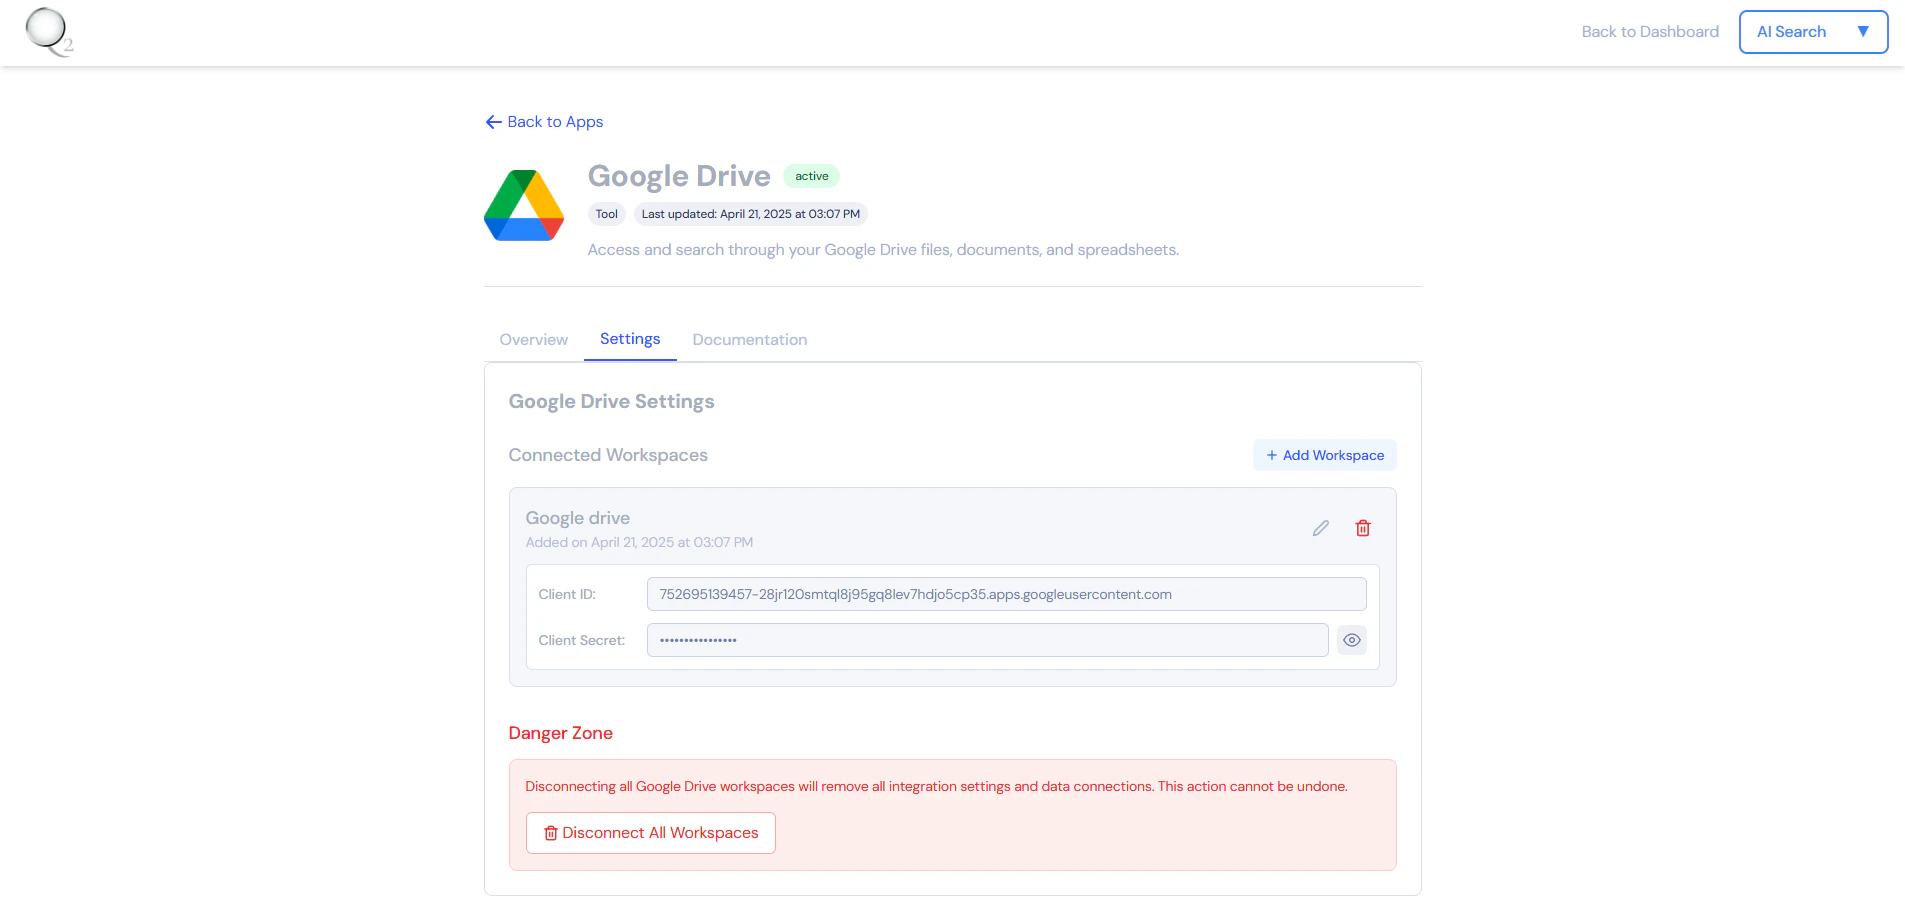
Step 2: Add Credentials to QuikQuery
Now that you have the Google Drive API credentials, you need to add them to QuikQuery.- Log in to QuikQuery .
- Navigate to Apps page.
- Select your desired bot from the list.
- Click Details on Google drive app.
- Navigate to the settings tab
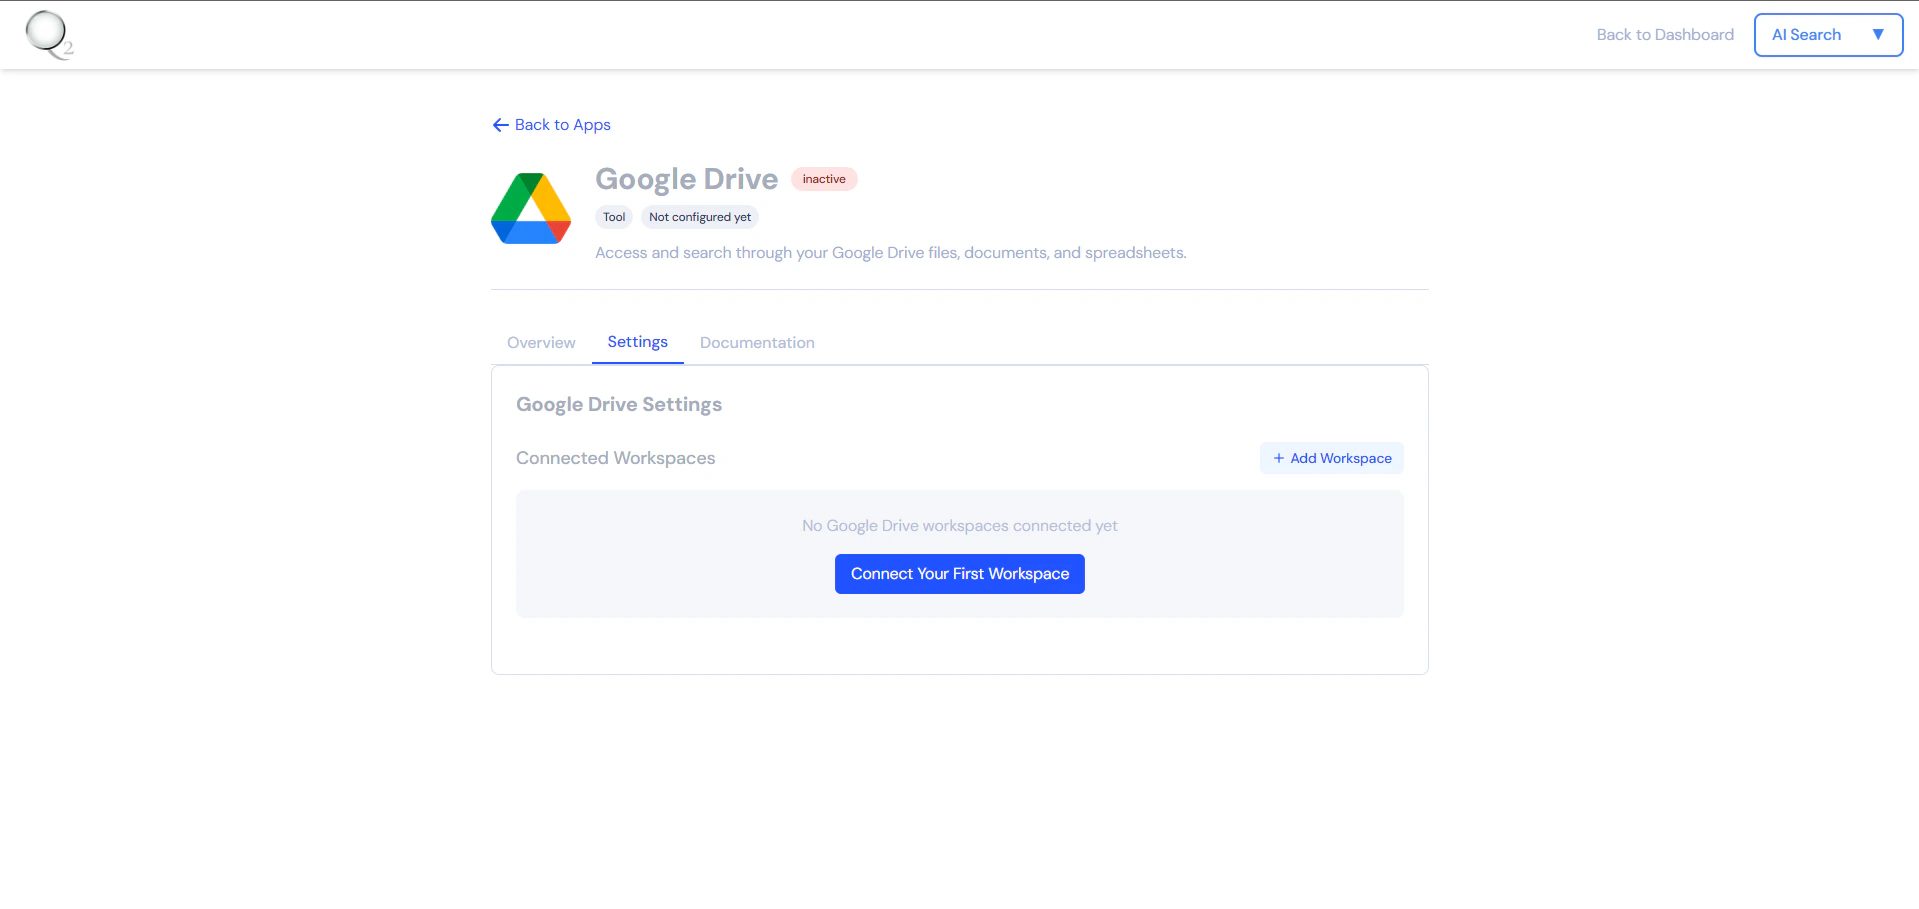
- Click “Add workspace” or “Connect your first workspace”
-
Enter your workspace details:
- Workspace name
- The Client id
- The Client secret
- Click “Add workspace” to save your configuration
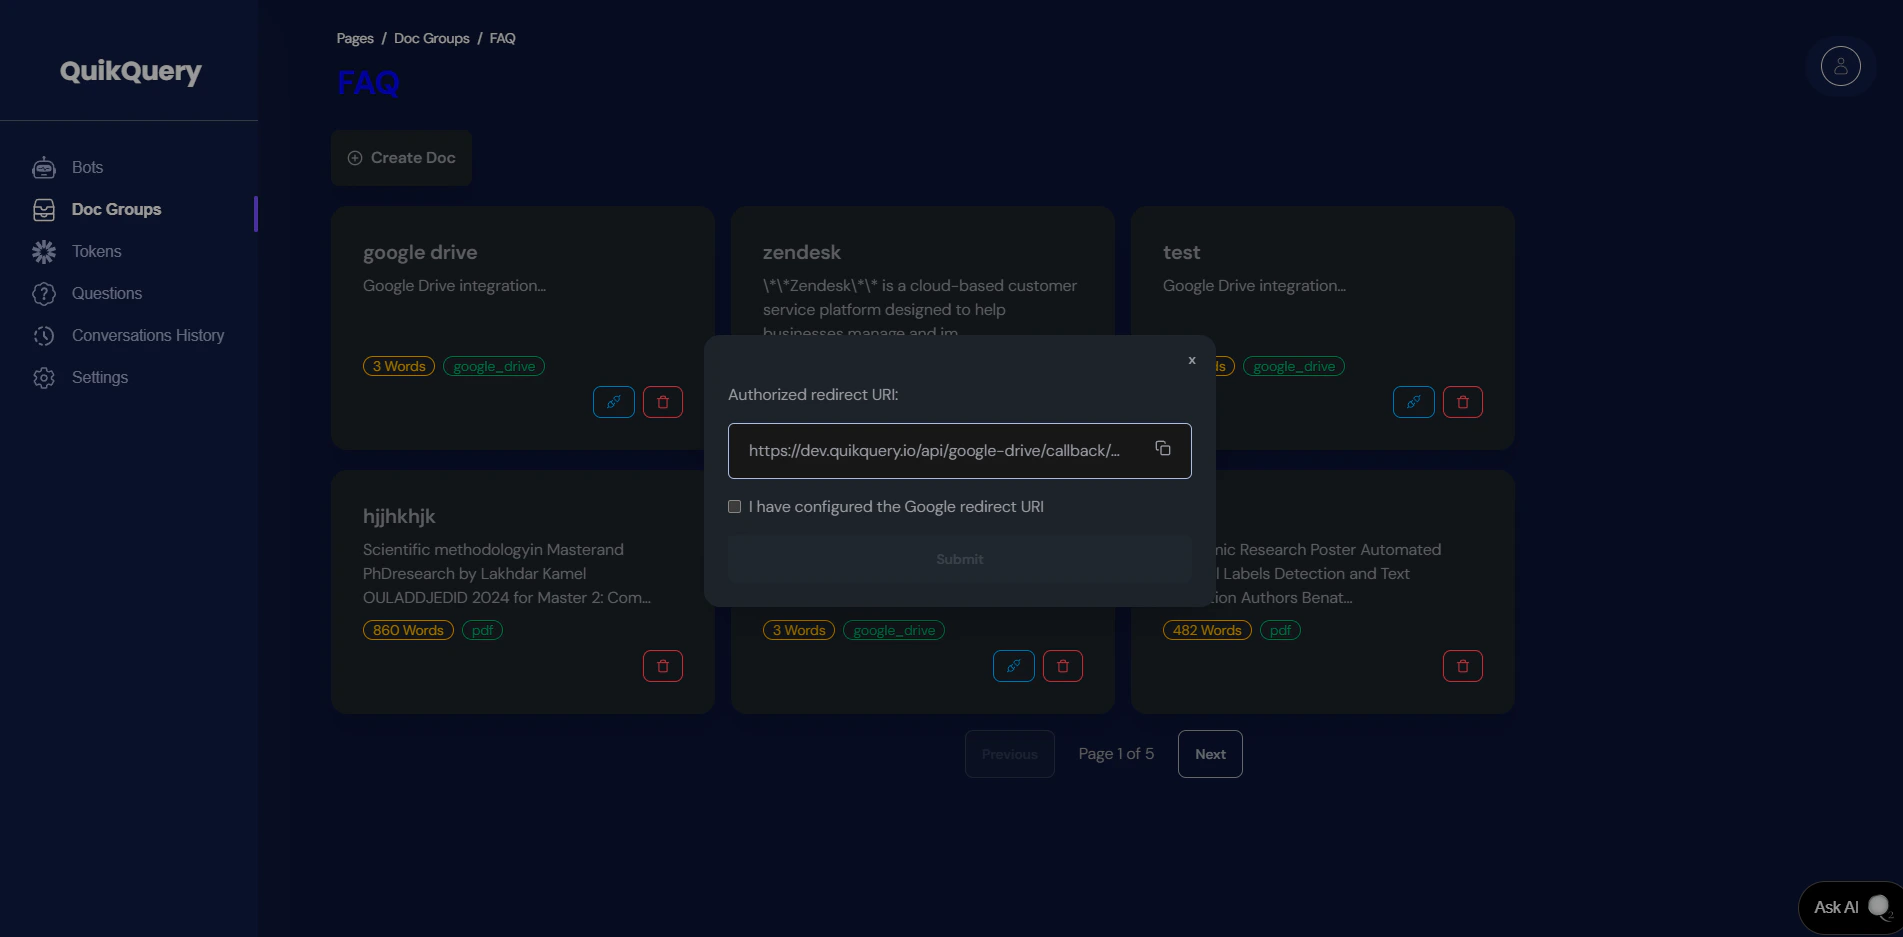
Step 3: Connect with Google Drive
To establish a connection between QuikQuery and Google Drive, you need to configure the redirect URI.- Navigate into QuikQuery Dashboard .
- Navigate to Doc Groups > View Documents > Docs.
- Click Create Doc.
- Choose Google Drive.
- Add a title and select the app that you created before.
- Click Connect.
3.1 Get the Redirect URL from QuikQuery
- In new doc that you created click on Connect button.
- A module containing the Redirect URL will appear.
-
Copy the Redirect URL.
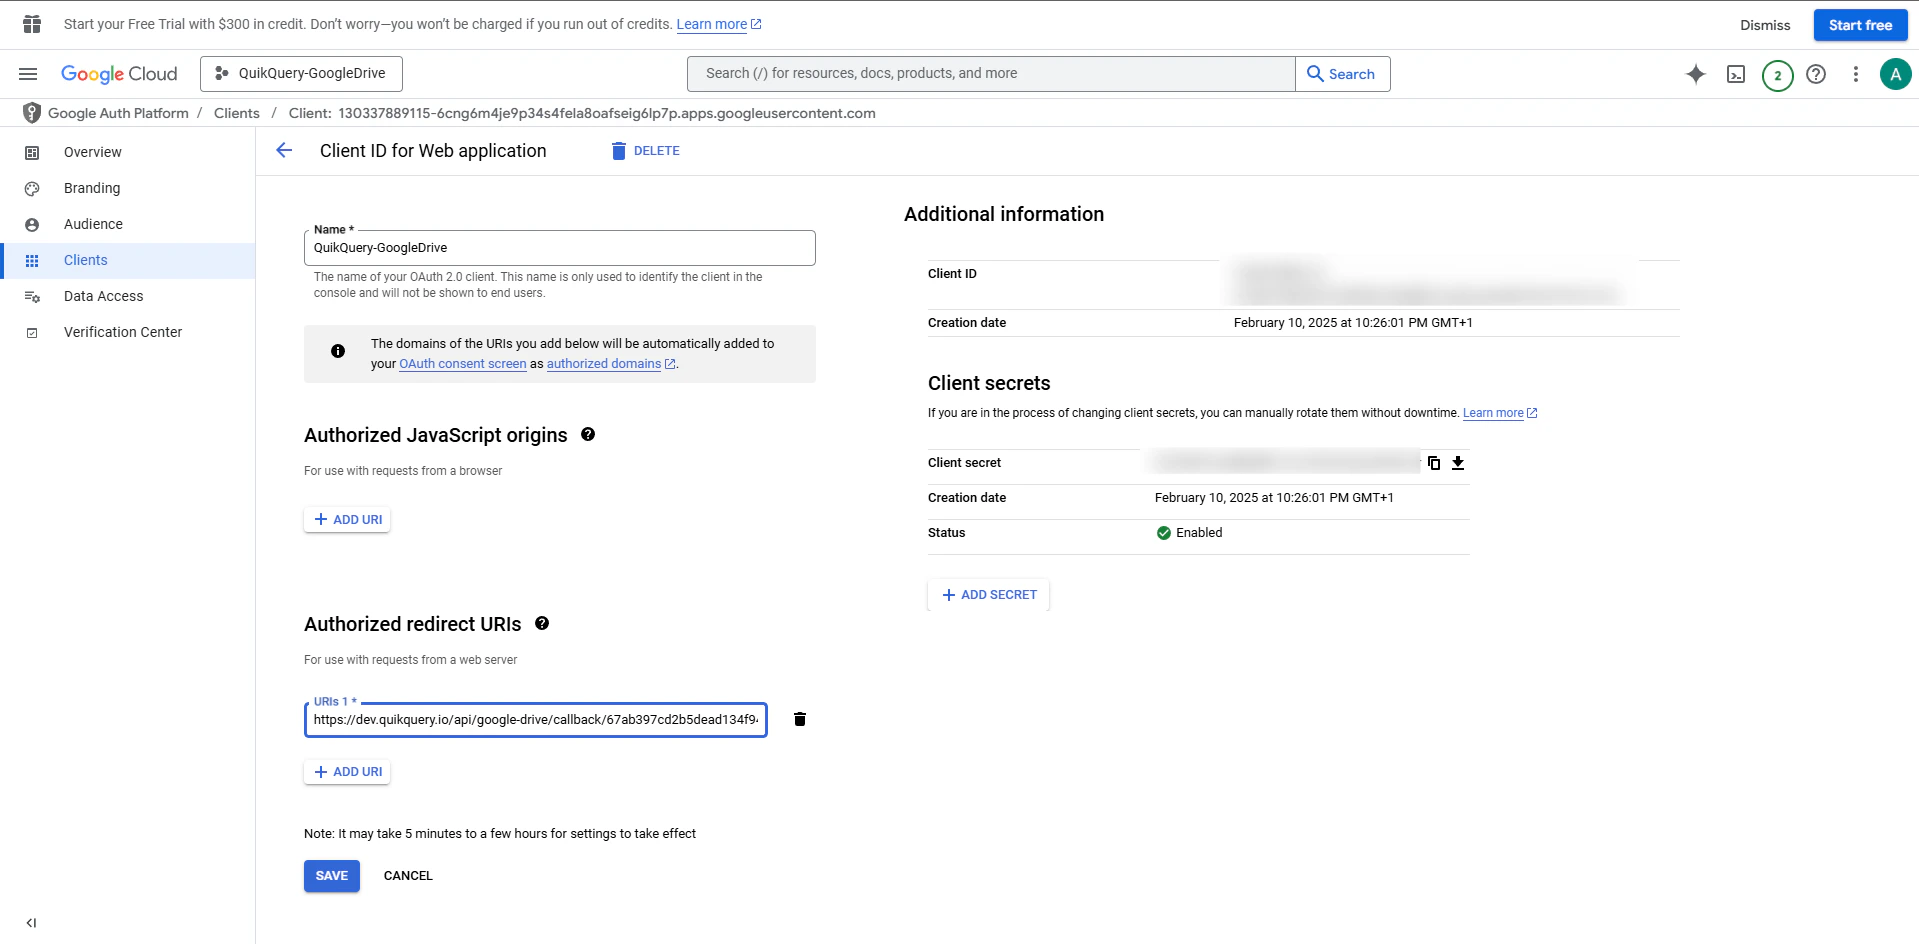
3.2 Add Redirect URL to Google Cloud Console
- Go back to the Google Cloud Console.
- Navigate to APIs & Services > Credentials.
- Click on the OAuth client you created earlier.
- Under Authorized redirect URIs, paste the redirect URL you copied from QuikQuery.
-
Click Save.
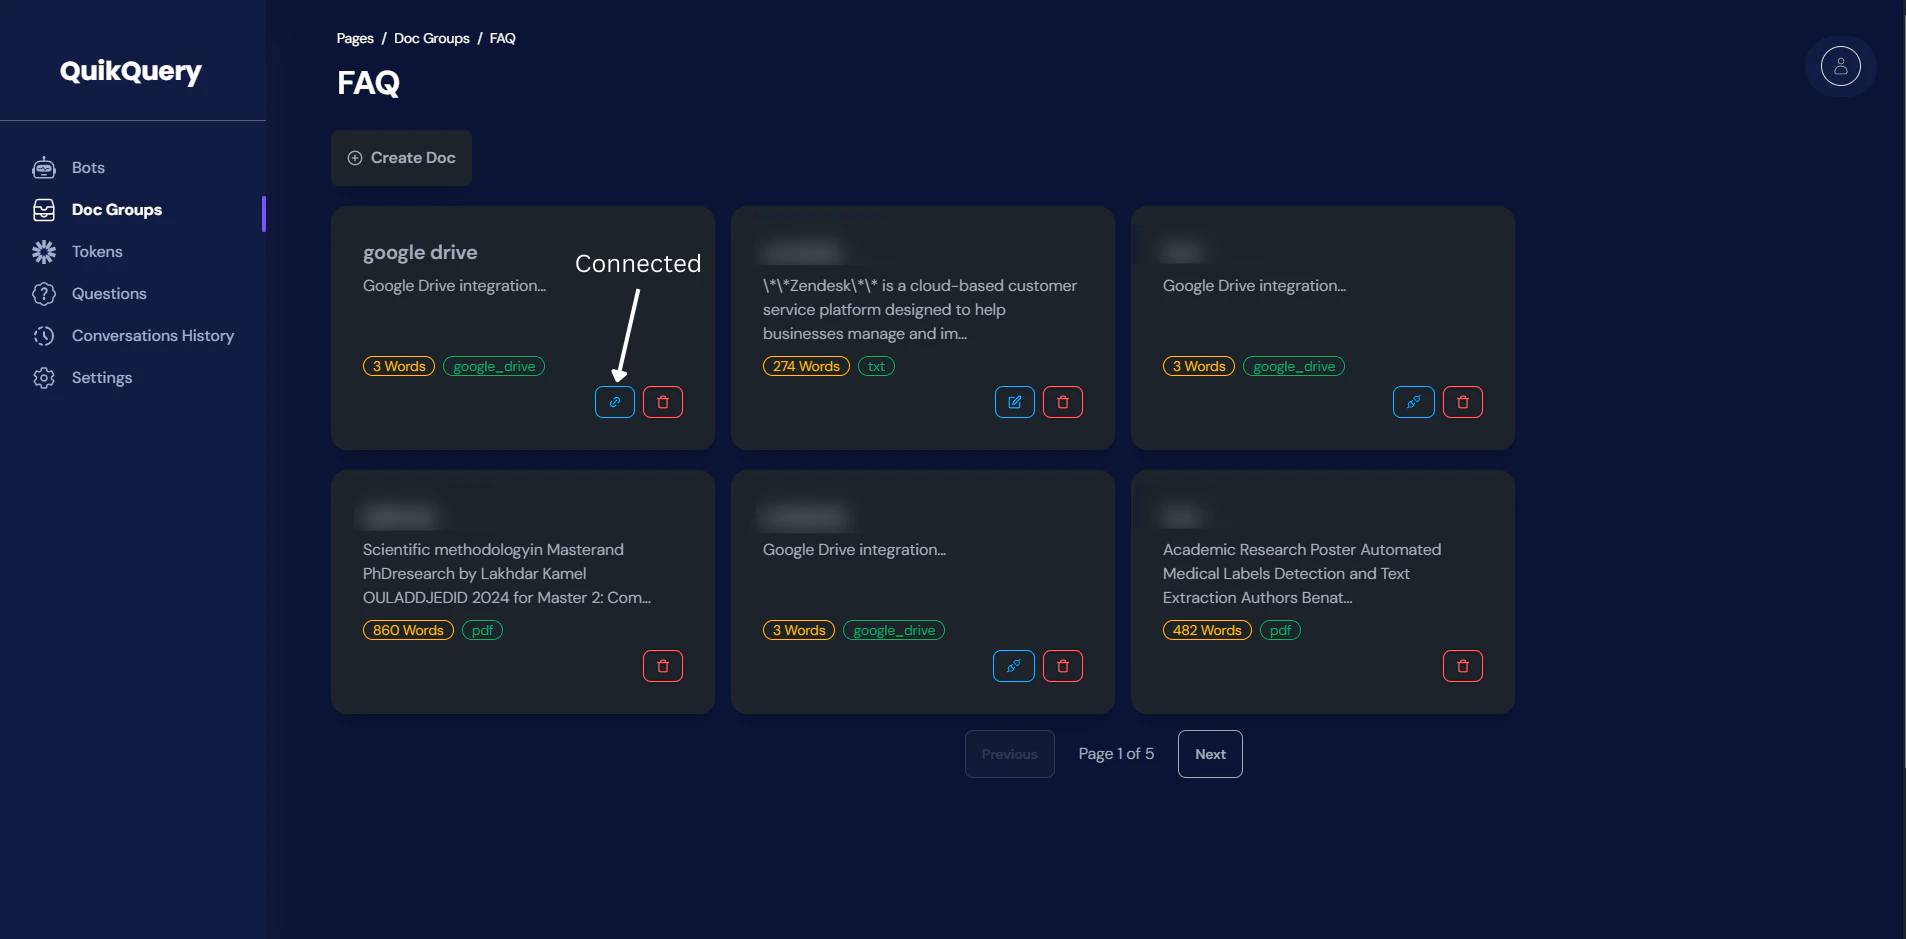
3.3 Complete the Connection
- Return to QuikQuery check on the checkbox and click Connect to Google Drive.
- You will be redirected to Google’s authorization page. Log in with the Google account you want to connect.
- Grant the necessary permissions to QuikQuery.
-
Once authorized, you will be redirected back to QuikQuery, and the connection will be established.
Step 4: Fetch Files from Google Drive
Once the connection is established, QuikQuery will fetch supported file types (txt, docx, pdf, pptx, Google Docs, Google Slides) from Google Drive and show it it modal.4.1 Supported File Types
QuikQuery supports the following file types:- Text files (.txt)
- Word documents (.docx)
- PDF files (.pdf)
- PowerPoint presentations (.pptx)
- Google Docs (native format)
- Google Slides (native format)
4.2 Selecting and saving Files
- Click on connected button.
- It will show you all the files in Google Drive.
- Select the files you want to add to QuikQuery.
- Click Submit Selected Files